FFMPEG Usages
FFMPEG 常用命令
抽取片段/切分影片
基本的 extract 指令具有这样的格式:
1

ffmpeg -ss "$ss" -to "$se" -i "$SRC" -c copy "$TGT"
在这里,ss 和 se 表示起止时间,其格式可以为:
hh:mm:ss.SSShh:mm:ssmm:ssss
SRC 和 TGT 表示源影片以及抽出的片段的输出文件名。为了保证 Video 和 Audio 不被隐式地应用转码,这两个文件名的后缀名必须相同,即 mp4 对 mp4,mkv 对 mkv,avi 对 avi,等等。
切割部分区域
切割一个区域为新影片:
1

ffmpeg -i input.mp4 -vf "crop=480:270:200:100" -c:v ffv1 -c:a copy output.mkv
如果你的 ffmpeg 没有 ffv1 解码器,或者转换出现问题,尝试下面一条命令:
1

ffmpeg -i input.mp4 -vf "crop=480:270:200:100" -c:v libx264 -crf 0 -c:a copy output.mp4
注意两者的区别。后者使用 x.264 编码视频流。
有时候你可能只是需要避免显式指定音频流策略,哪怕只是在指定完全原样复制:
1
2
3
4
5

# CAN'T WORK
ffmpeg -i input.mp4 -vf "crop=480:270:200:100" -c:v libx264 -crf 0 -c:a copy output.mp4

# THIS WORKS
ffmpeg -i input.mp4 -vf "crop=480:270:200:100" -c:v libx264 -crf 0 output.mp4
crop 参数 "crop=480:270:200:100" 的含义依次为:目标区域的宽度,高度,切割起点的左侧起点,上方起点。
所以该参数的含义为切割出一个 480x270 像素的区域,从原始视频左上角坐标 200x100 处开始向右下方框取该目标区域。
旋转
旋转一个影片的命令:
1

ffmpeg -i "$SRC" -vf "transpose=1" "$TGT"
在这里,transpose 的取值代表如下含义:
-
0 = 90CounterCLockwise and Vertical Flip (default)
-
1 = 90Clockwise
-
2 = 90CounterClockwise
-
3 = 90Clockwise and Vertical Flip
镜像
ffmpeg 的水平或者垂直翻转命令格式为:
1
2

ffmpeg -i INPUT.mp4 -vf vflip -c:a copy OUTPUT.mp4
ffmpeg -i INPUT.mp4 -vf hflip -c:a copy OUTPUT.mp4
这个操作没什么好说的
转码
转码本身比较简单,单纯地更改后缀名就行了:
1
2

ffmpeg -i input.mp4 output.avi
ffmpeg -i input.mp4 output.mkv
一个从原片 avi 转换到 mp4 的真实命令行如下:
1

ffmpeg -i $SRC -c:v copy -c:a copy ${SRC/avi/mp4}
${SRC/avi/mp4} 表达式将 SRC 文件名的 avi 替换为 mp4 达到字符串子串替换的目的。
-c:v copy -c:a copy 通常显式提供,目的是确保音频、视频流都是原样复制,不做改变。这个原样复制的意思,更多的含义是保持质素,而不是指保持 encoding 格式。
当必要时,你可能需要提供适当的 encoder
1
2
3

ffmpeg -i filename.avi -c:v libx265 -x265-params lossless=1 -c:a libfdk_aac -b:a 128k -y filename.mp4

ffmpeg -i filename.avi -c:v libx265 -x265-params lossless=0 -c:a copy -y filename.mp4
明确一下,lossless=1 代表采用无损编码方式。
生成 h.264 格式的 mp4
在 macOS 上原生支持 h.264 视频的预览,有时候这非常方便。所以对于源视频可以做专门的输出:
1
2

SRC="1.mkv"
ffmpeg -y -i "$SRC" -vcodec libx264 -acodec aac "$(basename "$SRC").mp4"
从网上下载的 .flv 或者 .webm,常常无法直接预览,也可以采用上面的命令来转码。
尽管大多数播放器都能做各种格式的视频播放,但能够直接预览还是会很方便的。
macOS 可预览
尽管上一节的方法通过将其它 codec 格式转换为 h.264 以及 aac 音频来试图让其在 macOS Finder 中可以 quicklook 的方式可预览,但是仍然会有一些视频即使如此做了之后依旧不能如愿。
其原因在于片源质量可能太高,原始的色彩编码使用的是专有的格式。解决的方法是在转码是将其强制为 yuv240p,这个点位编码方案有广泛的支持度,特别是在 Finder 中是能够良好地被预览的:
1
2

SRC="1.flv"
ffmpeg -y -i "$SRC" -pix_fmt yuv420p -vcodec libx264 -acodec aac "$(basename "$SRC").mp4"
确切地说,yuv420p 是一种颜色编码方法,它是有损的采样方式,简单的理解就是通过在水平和垂直方向上做 2:1 采样它可以有效地降低数据量,也就节省了频宽。在需要流畅平滑播放的场景,更小的频宽代表着对网速、硬盘、CPU、内存等各种资源等请求量更节约。
而高质量的片源为了获得专业级的色彩还原,有可能使用并非 YUV 色彩编码格式(例如 HVEC),又或者使用内嵌的色彩空间专用 Profile,它们往往要求播放器以及屏幕设备的更多的支援度,所以无法在快速预览的场景中被正确回放。
上面我们采用重新色彩编码的方式来保证 quicklook 预览,代价是损失了色彩还原,所以你需要注意保护原始片源。
如果你正在为 Android 等移动设备生成可以快速预览的视频,那么也可以采取 yuv420sp 编码方案,这同样是被允许用在 h.264 codec 中的色彩点位编码,且不少 Android 设备对该编码有更好的优化:sp 和 p 的区别在于 U 和 V 分量是 UVUV 方式交替摆放还是先放全部 U 平面然后再放全部 V 平面。
生成无损 webm
1
2
3

ffmpeg -i input.avi -c:v libvpx-vp9 -threads 7 -lossless 1 output.webm

ffmpeg -i input.avi -c:v libvpx-vp9 -lossless 1 output.webm
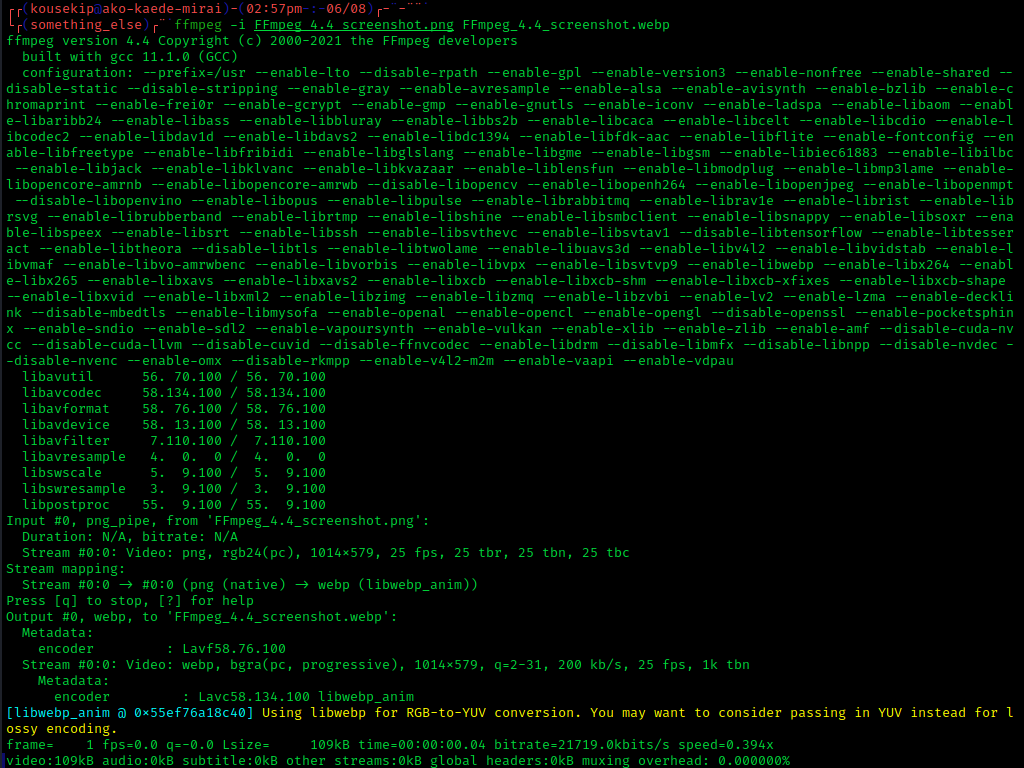
截取视频片段生成动图
生成 webp 格式的动态图,效果优于 gif,当然代价是尺寸往往更大。这多半是因为 webp 支持的图片的色深,尺寸,以及帧率全都完败 gif 的原因。
其命令格式为:
1
2
3
4
5
6
7
8
9

ffmpeg -i "$SRC" -vcodec libwebp -filter:v \
  fps=fps=20 \
  -lossless 0 \
	-compression_level 3 \
	-q:v 70 \
	-loop 1 \
	-preset picture \
	-an -vsync 0 \
	"$TGT"
在这里 fps=fps=20 并非错误编写,实则确实就是使用这样的格式来指定采集输出时所期望达到的帧率。一般来说从 webp 的使用场景来说,帧率 20 能够满足绝大多数展示需求,并且也取得的文件尺寸上的一定程度的迁就。
如果你希望不要压缩每一帧图,则使用 -compression_level 0,6 通常是指尽可能地最高压缩率。
-preset default 也是可接受的选项,往往和上例没有区别。但要注意,如果你正在使用 -lossless 0 -compression_level 0,那就不要给出任何 -preset 参数。
-q:v 70
-loop 1 要求 webp 的播放器自动循环该动图。
-an 的目的是移除音频流。虽然对于 webp encoder 来说它其实也并不必须,但是加上更有益处。类似地参数 -vn 是移除视频流,常常被用在产出 mp3,flac 等音频文件输出的场景。
要想生成 webp 动图,一个重点在于 TGT 文件名必须具有 .webp 后缀名。
Wanna Dive In?
- git.videolan.org Git - ffmpeg.git/commit WebP encode: use WebPAnimEncoder APO when avaliable
- FFmpeg Codecs Documentation - 9.11.1 Options
更改分辨率
一般地说,更改分辨率都是长宽等比缩放的。但这个等比需要你自行计算。
另一方面这并非强制要求,所以水平拉伸压缩,垂直拉伸压缩也可以,对于原片比例失调的情况常常很有用。
有的时候你可能想将 4:3 的原片重制为 16:10 或者 16:9,这通常更适合手机播放,那么就自己计算或者直接采用 iPhone 屏幕分辨率作为 scale 参数就是。
下面是一个样例:
1

ffmpeg -i input.mp4 -filter:v scale=1280:720 -c:a copy output.mp4
另一种格式为:
1

ffmpeg -i input.mp4 -s 640x480 -c:a copy output.mp4
更改宽高比
在更改分辨率处我们提到了修改宽高比的一种用法,实际上也可以采用专属命令来修改宽高比:
1

ffmpeg -i input.mp4 -aspect 16:9 output.mp4
这个 aspect 的取值常常为:
- 16:9
- 16:10
- 2:21:1
- 2:35:1
- 2:39:1
- 5:4
- 4:3
- 3:2
- 1:1
降低视频质量、压缩视频大小
削减视频质量可以明显地减小视频文件尺寸:
1
2
3
4
5
6

ffmpeg -i input.mp4 -vcodec libx265 -crf 28 output.mp4
ffmpeg -i input.mp4 -vcodec libx265 -crf 30 output.mp4

ffmpeg -i input.mp4 -c:v libx264 -preset veryslow -crf 24 output.mp4

ffmpeg -i input.mp4 -b 800k output.mp4
libx265 是指使用 H.265 视频格式,它更优秀:更高质量同时更小尺寸。使用 libx265 时 crf 可以尽量考虑 24-30。
当然,更小的 crf 值代表更高的 bitrates 以及更高的视频质量。
后两条命令作为参考,有时候比较简便。
高级削减
一个典型的做法是削减视频质量的同时也对其做分辨率削减:
1

ffmpeg -i input.mkv -vf "scale=trunc(iw/4)*2:trunc(ih/4)*2" -c:v libx265 -crf 28 half_the_frame_size.mkv
这个命令在压缩帧率的同时,将分辨率减小一半。类似的命令还可以是:
1
2
3
4
5
6
7
8

# One third size
ffmpeg -i input.mkv -vf "scale=trunc(iw/8)*2:trunc(ih/8)*2" -c:v libx265 -crf 28 a_fourth_the_frame_size.mkv

# One quarter size:
ffmpeg -i input.mkv -vf "scale=trunc(iw/8)*2:trunc(ih/8)*2" -c:v libx265 -crf 28 a_fourth_the_frame_size.mkv

# One fifth size:
ffmpeg -i input.mkv -vf "scale=trunc(iw/10)*2:trunc(ih/10)*2" -c:v libx265 -crf 28 a_fifth_the_frame_size.mkv
这个 tip 来自于:
https://unix.stackexchange.com/a/447521
当然,如果你不想做 size 保护的话:
1

ffmpeg -i $infile -vf "scale=iw/2:ih/2" $outfile
其命令行更简单,因为不再调用内建函数 trunc 来取整除法结果了。来自于:
https://unix.stackexchange.com/a/498642
为音频添加海报图像
B 站常常有一组音乐的 playlist,其视频就是一副静态图。这可以这么制作:
1

ffmpeg -loop 1 -i input-image.jpg -i input-audio.mp3 -c:v libx264 -c:a aac -strict experimental -b:a 192k -shortest output.mp4
使用无损音乐源,那就给 input-audio.flac。
使用无损海报源,那就给 input-image.png。
另外的例子:
1
2
3
4

ffmpeg -loop 1 -i img.jpg -i audio.wav -c:v libx264 -c:a aac -b:a 192k -shortest out.mp4

# use stream copy (re-mux) mp3 instead of re-encoding, which will preserve the audio quality
ffmpeg -loop 1 -i img.jpg -i audio.m4a -c:v libx264 -c:a copy -shortest out.mp4
如果要控制为 30 秒:
1

ffmpeg -loop 1 -i img.jpg -c:v libx264 -t 30 -pix_fmt yuv420p out.mp4
如果你想给几张图片的循环播放,可以分为两步。第一是将这些图片添加制作为动图循环。参见 使用 join.txt 和 concat 指令
然后第二步再将其和音频相结合。
当然一步到位其实也可以。
参考
- 使用 join.txt 和 concat 指令
- Slideshow – FFmpeg
- Create a thumbnail image every X seconds of the video
- FFmpeg image file demuxer documentation
- H.264 Encoding Guide
- H.265 Encoding Guide
连接多个视频 - Join
首先是准备一个序列文件 join.txt,其中内容的格式像这样:
1
2
3
4

file /path/to/video-samples/part1.mp4
file /path/to/video-samples/part2.mp4
file /path/to/video-samples/part3.mp4
file /path/to/video-samples/part4.mp4
它们的格式必须相同,所以你可能需要提前处理转码。
它们的分辨率可以不必相同,但那就需要你有心理准备或者设计思路。
然后是执行连接动作:
1

ffmpeg -f concat -safe 0 -i join.txt -c copy output.mp4
在 join.txt 中指定一组图片文件,则可以连接静态图为一个视频。参见 使用 join.txt 和 concat 指令
Slideshow
无需要解释更多:
1

ffmpeg -framerate 24 -i img%03d.png output.mp4
更复杂的例子:
1
2
3
4
5
6
7
8

# give a start number
ffmpeg -start_number 126 -i img%03d.png -pix_fmt yuv420p out.mp4

# grab file from pattern
ffmpeg -framerate 10 -pattern_type glob -i '*.jpg' -c:v libx264 -pix_fmt yuv420p out.mp4

# Use shell pipe
cat *.png | ffmpeg -f image2pipe -i - output.mkv
使用 join.txt 和 concat 指令
准备 join.txt 如下:
1
2
3
4
5
6
7
8
9

file '/path/to/dog.png'
duration 5
file '/path/to/cat.png'
duration 1
file '/path/to/rat.png'
duration 3
file '/path/to/tapeworm.png'
duration 2
file '/path/to/tapeworm.png'
然后 concat 它们:
1

ffmpeg -f concat -i input.txt -vsync vfr -pix_fmt yuv420p output.mp4
参考
添加水印
文字水印
添加文字水印
1
2
3
4

ffmpeg –i input.mp4 -vf "drawtext=fontfile=simhei.ttf: text='一只睡不醒的猫':x=12:y=12:fontsize=12:fontcolor=white:shadowy=5" output.mp4

# for macOS
ffmpeg –i input.mp4 -vf "drawtext=text='一只睡不醒的猫':x=12:y=12:fontsize=12:fontcolor=white:shadowy=5" output.mp4
drawtext 文档:drawtext filter documentation
文字是直接打印上去的
图片水印
但是对于图片水印来说,则是覆盖的一个新的图层到前一视频流 input.ts 之上,同时可以设定透明度以达到水印效果:
1

ffmpeg -i input.ts -i logo.png  -filter_complex  "overlay=20:20" output.mp4
去除图片水印
1

ffmpeg -i input.mp4 -vf delogo=x=0:y=0:w=120:h=120 output.mp4
注意这需要你的 ffmpeg 在编译时带有 –delogo 参数,支持 delogo 指令才行。如果你的 ffmpeg 执行去除水印指令出错,那么你需要重新编译或者寻找合适的 ffmpeg 编译二进制文件。
编译指令可能长的这样:
1
2
3

./configure --prefix=/usr/local/ffmpeg --enable-gpl  --enable-nonfree --enable-filter=delogo --enable-debug --disable-optimizations --enable-shared  --enable-pthreads,
make
sudo make install
但请勿直接使用上面的命令序列。因为它没有给出其他 filters,请专业人士进行相关操作。
查看视频信息
1

ffprobe input.mp4
ffprobe 是随 ffmpeg 安装包发行的可执行文件。类似的还有 ffplay 等等。
也可以直接列举:
1

ffmpeg -i input.mp4
抽取字幕
简单方法是:
1

ffmpeg -i input_file out.srt
如果输入视频有多条字幕轨道,那么应该用下面的形式:
1

ffmpeg -i Movie.mkv -map 0:s:0 subs.srt
- -i: Input file URL/path.
- -map: Designate one or more input streams as a source for the output file.
- s:0: Select the subtitle stream.
This would download the first subtitle track. If there are several, use 0:s:1 to download the second one, 0:s:2 to download the third one, and so on.
- ExtractSubtitles – FFmpeg
- How to extract subtitle from video using ffmpeg? - Super User
- Extract every audio and subtitles from a video with ffmpeg
抽出 dvdsub 格式
dvdsub 格式常见于 DVD 发行的碟片或者源于此的 mkv 中,通常都是有一堆多条字幕轨。有时候它也被称作 vobsub。dvdsub 格式是位图方式的,所以抽取出来之后应该是 .idx 和 .sub 两个文件配套。
抽取的方法需要两个步骤:
1

i=0; ffmpeg -y -i "$SRC" -c dvdsub -f matroska -map 0:s:$i "sub-$i.mkv" && mkvextract sub-$i.mkv tracks 0:sub
i 用于指定抽出哪条字幕轨,然后要用到 mkvextract 工具来将 sub-0.mkv 中写入的信息转换为 idx+sub。最终得到的结果为 sub.idx, sub.sub,注意中间文件 sub-0.mkv 即可删除。
转换到 srt
Linux 中有 vobsub2srt 软件包可以将 idx/sub 转换为 srt。
macOS 中可以试试 brew install sub2srt 这个工具。
查看字幕、音轨、影轨信息
如下例,
1
2
3
4
5
6
7
8
9
10
11
12
13
14
15
16
17
18
19
20
21
22
23
24
25
26
27
28
29
30
31
32
33
34
35
36
37
38
39
40
41
42
43
44
45
46
47
48
49
50
51
52
53
54
55
56
57
58
59
60
61
62
63
64
65
66
67
68
69
70
71
72
73
74
75
76
77
78
79
80
81
82
83
84
85
86
87
88
89
90
91
92
93
94
95
96
97
98
99
100
101
102
103
104
105
106
107
108
109
110
111
112

$ ffprobe -v error -show_entries stream=index,codec_name,codec_type "$SRC"                            13:57:53 ✗ TTY:s005
[matroska,webm @ 0x7fcf7e7051c0] 0x00 at pos 18555347367 (0x451fc21a7) invalid as first byte of an EBML number
[STREAM]
index=0
codec_name=hevc
codec_type=video
[/STREAM]
[STREAM]
index=1
codec_name=aac
codec_type=audio
[/STREAM]
[STREAM]
index=2
codec_name=dvd_subtitle
codec_type=subtitle
[/STREAM]
[STREAM]
index=3
codec_name=dvd_subtitle
codec_type=subtitle
[/STREAM]
[STREAM]
index=4
codec_name=dvd_subtitle
codec_type=subtitle
[/STREAM]
[STREAM]
index=5
codec_name=dvd_subtitle
codec_type=subtitle
[/STREAM]
[STREAM]
index=6
codec_name=dvd_subtitle
codec_type=subtitle
[/STREAM]
[STREAM]
index=7
codec_name=dvd_subtitle
codec_type=subtitle
[/STREAM]
[STREAM]
index=8
codec_name=dvd_subtitle
codec_type=subtitle
[/STREAM]
[STREAM]
index=9
codec_name=dvd_subtitle
codec_type=subtitle
[/STREAM]
[STREAM]
index=10
codec_name=dvd_subtitle
codec_type=subtitle
[/STREAM]
[STREAM]
index=11
codec_name=dvd_subtitle
codec_type=subtitle
[/STREAM]
[STREAM]
index=12
codec_name=dvd_subtitle
codec_type=subtitle
[/STREAM]
[STREAM]
index=13
codec_name=dvd_subtitle
codec_type=subtitle
[/STREAM]
[STREAM]
index=14
codec_name=dvd_subtitle
codec_type=subtitle
[/STREAM]
[STREAM]
index=15
codec_name=dvd_subtitle
codec_type=subtitle
[/STREAM]
[STREAM]
index=16
codec_name=dvd_subtitle
codec_type=subtitle
[/STREAM]
[STREAM]
index=17
codec_name=dvd_subtitle
codec_type=subtitle
[/STREAM]
[STREAM]
index=18
codec_name=dvd_subtitle
codec_type=subtitle
[/STREAM]
[STREAM]
index=19
codec_name=dvd_subtitle
codec_type=subtitle
[/STREAM]
[STREAM]
index=20
codec_name=dvd_subtitle
codec_type=subtitle
[/STREAM]
[STREAM]
index=21
codec_name=dvd_subtitle
codec_type=subtitle
[/STREAM]
Installations
Install ffmpeg on macOS
via brew
1
2
3

brew update
brew upgrade
brew install ffmpeg
Install git HEAD version
1

brew install ffmpeg --HEAD
Install third-party ffmpeg
其特点是充满了定制参数能力。
1

brew install homebrew-ffmpeg/ffmpeg/ffmpeg
Since v2.0, Homebrew does not offer options for its core formulae anymore. Users who want to build ffmpeg with additional libraries (including non-free ones) need to use so-called taps from third party repositories. These repositories are not maintained by Homebrew.
The following repositories for ffmpeg are available – refer to the README for additional information about the included options:
ffmpeg can be installed from the repository using its full formula name after tapping, for example:
Options are available with
brew options homebrew-ffmpeg/ffmpeg/ffmpeg.
简单比较,brew 基准版本:
1

--enable-shared --enable-pthreads --enable-version3 --cc=clang --host-cflags= --host-ldflags= --enable-ffplay --enable-gnutls --enable-gpl --enable-libaom --enable-libaribb24 --enable-libbluray --enable-libdav1d --enable-libmp3lame --enable-libopus --enable-librav1e --enable-librist --enable-librubberband --enable-libsnappy --enable-libsrt --enable-libsvtav1 --enable-libtesseract --enable-libtheora --enable-libvidstab --enable-libvmaf --enable-libvorbis --enable-libvpx --enable-libwebp --enable-libx264 --enable-libx265 --enable-libxml2 --enable-libxvid --enable-lzma --enable-libfontconfig --enable-libfreetype --enable-frei0r --enable-libass --enable-libopencore-amrnb --enable-libopencore-amrwb --enable-libopenjpeg --enable-libspeex --enable-libsoxr --enable-libzmq --enable-libzimg --disable-libjack --disable-indev=jack --enable-videotoolbox
homebrew-ffmpeg/ffmpeg 版本
1
2
3
4
5
6
7
8
9
10
11
12
13
14
15
16
17
18
19
20
21
22
23
24
25
26
27
28
29
30
31
32
33
34
35
36
37
38
39
40
41
42
43
44
45
46
47
48
49
50
51
52
53
54
55
56
57
58
59
60
61
62
63
64
65
66
67
68
69
70
71
72
73
74
75
76
77
78
79
80
81
82
83
84
85
86
87
88
89
90
91

==> homebrew-ffmpeg/ffmpeg/ffmpeg: stable 5.1.2-with-options, HEAD
Play, record, convert, and stream audio and video
https://ffmpeg.org/
/usr/local/Cellar/ffmpeg/5.1.2_5 (282 files, 52.0MB) *
  Poured from bottle using the formulae.brew.sh API on 2023-02-22 at 12:04:24
From: https://github.com/homebrew-ffmpeg/homebrew-ffmpeg/blob/HEAD/Formula/ffmpeg.rb
License: GPL-2.0-or-later
==> Dependencies
Build: pkg-config ✔, nasm ✘
Required: aom ✔, dav1d ✔, fontconfig ✔, freetype ✔, frei0r ✔, lame ✔, libass ✔, libvorbis ✔, libvpx ✔, opus ✔, sdl2 ✔, snappy ✔, theora ✔, x264 ✔, x265 ✔, xz ✔
Optional: aribb24 ✔, fdk-aac ✘, game-music-emu ✘, jack ✘, libbluray ✔, libbs2b ✘, libcaca ✘, libgsm ✘, libmodplug ✘, libopenmpt ✘, librist ✔, librsvg ✘, libsoxr ✔, libssh ✔, libvidstab ✔, libvmaf ✔, libxml2 ✘, opencore-amr ✔, openh264 ✘, openjpeg ✔, [email protected] ✔, rav1e ✔, rtmpdump ✘, rubberband ✔, speex ✔, srt ✔, svt-av1 ✔, tesseract ✔, two-lame ✘, webp ✔, xvid ✔, zeromq ✔, zimg ✔
==> Options
--with-aribb24
	Build with aribb24 support
--with-chromaprint
	Enable the Chromaprint audio fingerprinting library
--with-decklink
	Enable DeckLink support
--with-fdk-aac
	Enable the Fraunhofer FDK AAC library
--with-game-music-emu
	Enable Game Music Emu (GME) support
--with-jack
	Enable Jack support
--with-libaribb24
	Enable decoding ARIB/ISDB captions
--with-libbluray
	Build with libbluray support
--with-libbs2b
	Build with libbs2b support
--with-libcaca
	Build with libcaca support
--with-libgsm
	Build with libgsm support
--with-libmodplug
	Enable module/tracker files as inputs via libmodplug
--with-libopenmpt
	Enable module/tracker files as inputs via libopenmpt
--with-librist
	Enable Reliable Internet Stream Transport (RIST) support
--with-librsvg
	Enable SVG files as inputs via librsvg
--with-libsoxr
	Enable the soxr resample library
--with-libssh
	Enable SFTP protocol via libssh
--with-libvidstab
	Enable vid.stab support for video stabilization
--with-libvmaf
	Enable libvmaf scoring library
--with-libxml2
	Enable libxml2 library
--with-libzvbi
	Enable decoding of DVB teletext pages and DVB teletext subtitles
--with-opencore-amr
	Enable Opencore AMR NR/WB audio format
--with-openh264
	Enable OpenH264 library
--with-openjpeg
	Enable JPEG 2000 image format
--with-openssl
	Enable SSL support
--with-openssl@1.1
	Build with [email protected] support
--with-rav1e
	Enable AV1 encoding via librav1e
--with-rtmpdump
	Enable RTMP dumping support
--with-rubberband
	Enable rubberband library
--with-speex
	Build with speex support
--with-srt
	Enable SRT library
--with-svt-av1
	Enable Scalable Video Technology for AV1
--with-tesseract
	Enable the tesseract OCR engine
--with-two-lame
	Build with two-lame support
--with-webp
	Enable using libwebp to encode WEBP images
--with-xvid
	Build with xvid support
--with-zeromq
	Enable using libzeromq to receive cmds sent through a libzeromq client
--with-zimg
	Enable z.lib zimg library
--HEAD
	Install HEAD version
Download binary from Official site
\1. Visit the official FFmpeg download page.
\2. In the Get packages & executable files section, select the Apple logo and click the Static builds for macOS 64-bit link.
\3. Scroll down to the FFmpeg section and choose a version. To download the latest snapshot, select Download as ZIP in the column on the left side.
\3. After downloaded, extract the executable and copy into /usr/local/bin
Compiling from source
You can of course build FFmpeg tools yourself, following the OS X compilation guide. This guide will always be up to date, and by manually compiling you may be able to tweak a few parameters.
REFs
- 技术:给新手的 20 多个 FFmpeg 命令示例
- Encode/FFV1 – FFmpeg
- List of Lossless FFmpeg Video Encoders - AntumDeluge
- List of codecs - Wikipedia
Refs - List of Lossless FFmpeg Video Encoders from AntumDeluge
This is a list of lossless video encoders that can be used with FFmpeg.
(this list may be outdated)
Lossless:
- ffv1 – (FFmpeg Video Codec 1)
- flashsv – (Flash Screen Video 1)
- gif – (Graphics Interchange Format)
- png – (Portable Network Graphics)
- qtrle – (Apple Quicktime Animation (RLE))
- zmbv – (Zip Motion Block / DosBox Capture Codec)
Lossless Intra Frames Only:
- bmp – (Bitmap Image)
- dpx – (Digital Picture Exchange)
- ffvhuff – (Huffyuv FFmpeg variant)
- huffyuv – (HuffYUV)
- ljpeg – (Lossless JPEG)
- pam – (Portable AnyMap / Netpbm)
- pbm – (Portable BitMap / Netpbm)
- pcx – (PC Paintbrush / Personal Computer Exchange Image)
- pgm – (Portable GrayMap / Netpbm)
- pgmyuv – (Portable GrayMap YUV / Netpbm)
- ppm – (Portable PixMap / Netpbm)
- r10k – (AJA Kona 10-bit RGB Codec)
- r210 – (Uncompressed RGB 10-bit)
- rawvideo – (Raw Video)
- sgi – (Silicon Graphics Image)
- sunrast – (Sun Raster Image)
- targa – (Truevision TGA Image)
- tiff – (Tagged Image File Format)
- utvideo – (Ut Video)
- v210 – (Uncompressed 4:2:2 10-bit)
- v410 – (Uncompressed 4:4:4 10-bit / SheerVideo?)
- xbm – (X BitMap)
- xwd – (X Window Dump)
- zlib – (Lossless Codec Library ZLIB)
Optionally Lossless:
- dirac / libschroedinger – (Dirac Compression Format)
- h264 / libx264 / libx24rgb – (H.264 / MPEG-4 AVC)
- snow – (Snow)
Optionally Lossless Intra Frames Only:
- jpeg2000 / libopenjpeg – (JPEG 2000)
- jpegls – (JPEG-LS / Lossless JPEG)
![]()