
定制 vscode 中的 markdown 预览样式
对于个人的开发环境,有时候一些小的技巧很难再被记住了,所以只好收录在某处
UPDATED(2021-09-23 深夜):
由于站点停用和迁移,本文中的样式表文件现在单独存放了一份copy:
https://github.com/hzimg/blog-pics/blob/master/vscode.markdown-styles.custom.css
你将可以直接使用它:

言简意赅,这次写的简单点。
步骤
目标已经明确,解决问题的方法如下:
准备css文件
例如叫做 vscode.styles.css,其模版内容如下,注意你可以开始自己的自定义了:
1
2
3
4
5
6
7
8
9
10
11
12
13
14
15
16
17
18
19
20
21
22
23
24
25
26
27
28
29
30
31
32
33
34
35
36
37
38
39
40
41
42
43
44
/** * vscode-markdown.css */
h1, h2, h3, h4, h5, h6, p, blockquote { margin: 0; padding: 0;}
body {
  font-family: 'Playfair Display', 'Gayathri', Georgia, Times, "PingFang SC", "Hiragino Sans GB",
  -apple-system, BlinkMacSystemFont, 'Segoe WPC', 'Segoe UI',
  Helvetica, system-ui, 'Ubuntu', 'Droid Sans', Arial, sans-serif !important;
  padding: 1em; margin: auto; max-width: 42em; color: #737373;
  background-color: white; margin: 10px 13px 10px 13px;}
table { margin: 10px 0 15px 0; border-collapse: collapse;}
td, th { border: 1px solid #ddd; padding: 3px 10px;}
th { padding: 5px 10px; }
a { color: #0069d6; }
a:hover { color: #0050a3; text-decoration: none;}
a img { border: none; }
p { margin-bottom: 9px; }
h1, h2, h3, h4, h5, h6 {
  font-family: 'Merriweather', 'Long Cang', inherit !important; /*font-variant: small-caps;*/
  color: #404040; line-height: 36px;}
h1 { margin-bottom: 18px; font-size: 30px; }
h2 { font-size: 24px; }
h3 { font-size: 18px; }
h4 { font-size: 16px; }
h5 { font-size: 14px; }
h6 { font-size: 13px; }
hr { margin: 0 0 19px; border: 0; border-bottom: 1px solid #ccc;}
blockquote{ color:#666666; margin:0; padding-left: 3em; border-left: 0.5em #EEE solid; font-family: "STKaiti", georgia, serif;}
code, pre {
  font-family: 'Overpass', 'Cascadia Code', Monaco, 'Andale Mono', Consolas,
  "Lucida Console", 'Courier New', courier, monospace !important;
  font-size: 12px;}
code { background-color: #ffffe0; border: 1px solid orange; color: rgba(0, 0, 0, 0.75); padding: 1px 3px; -webkit-border-radius: 3px; -moz-border-radius: 3px; border-radius: 3px;}
pre { display: block; background-color: #f8f8f8;  border: 1px solid #2f6fab; border-radius: 3px; overflow: auto; padding: 14px; white-space: pre-wrap; word-wrap: break-word;}
pre code { background-color: inherit; border: none;  padding: 0;}
sup { font-size: 0.83em; vertical-align: super; line-height: 0;}
* { -webkit-print-color-adjust: exact;}

body {background-color: #f1f2f3;}
@media screen and (min-width: 914px) {
  body { width: 854px; margin: 10px auto; background-color: #f1f2f3; }
}
@media print {
  body, code, pre code, h1, h2, h3, h4, h5, h6 { color: black; background-color: #f1f2f3; }
  table, pre { page-break-inside: avoid; }
}
上传 css 文件
上传刚才的 css 文件到可以外链的地方,无论是 github,gist等等都好。
得到其外链地址,在浏览器中测试一下。
应用到 markdown 插件中
vscode 自带了 markdown 功能,所以我们可以找到 vscode 的用户设置文件(macOS: ~/Library/Application Supports/Code/User/settings.json,windows:%APPDATA%\Code\User\settings. json, Linux: $HOME/. config/Code/User/settings.json),编辑其内容加入如下的片段:
1
2
3
4
5
6
{
  ...,
    "markdown.styles": [
        "https://github.com/hzimg/blog-pics/blob/master/vscode.markdown-styles.custom.css?t=.00000011",
    ]
}
请将上面的 URL 替换为你的外链地址。
存盘该 settings.json 文件时 vscode 将会自动刷新 markdown 预览效果。
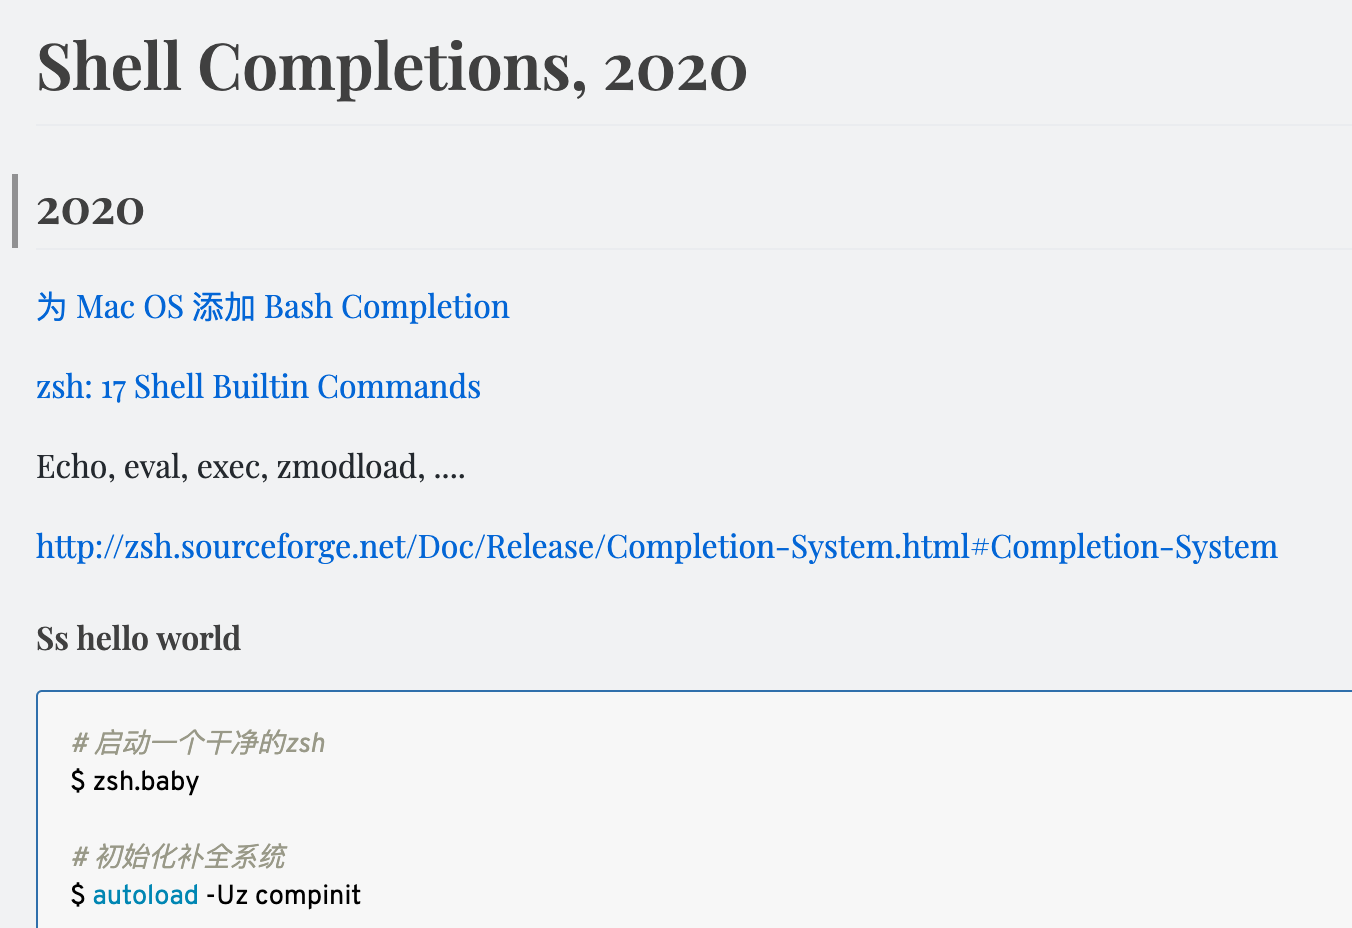
一个参考图如下:
以上!
🔚


留下评论